

List is one of the most important aspects of email marketing as it is the easiest tool you can use to categorize your email contacts. The other tool being "Segment", is discussed on a different article. Let's say you have 500 contacts coming from different field of endeavors such as gaming, academics, government, and aerospace. 100 of them came from the academics sector, 50 from the government, 100 from the aerospace sector, and 250 from the gaming population for example. What one may want to is to create 4 different lists, and then associate all the 500 contacts with their respective list.
Creating lists using your iContact Email Marketing Software is very straightforward. To create a list on your iContact account, please follow these steps:
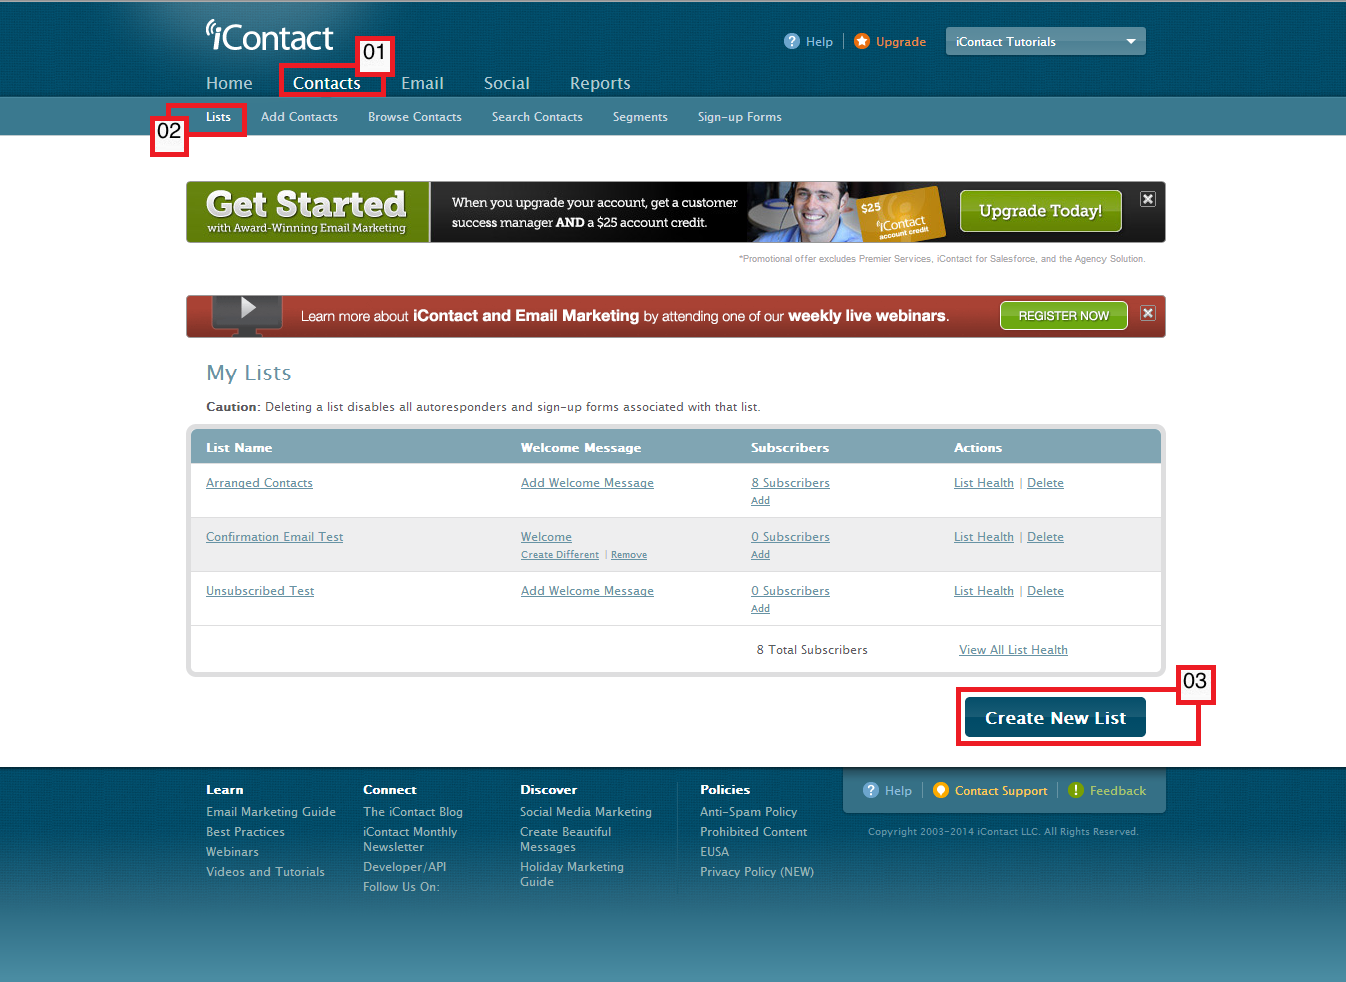
01. Click on the "Contacts" tab. This should display the "Contacts" tab's options on the dark blue bar below it.
02. Click on the "Lists" option from here, which should take you to your "My Lists" page.
03. Click on the "Create New List" button. This should take you to your "List Settings" page.
Another option would be:
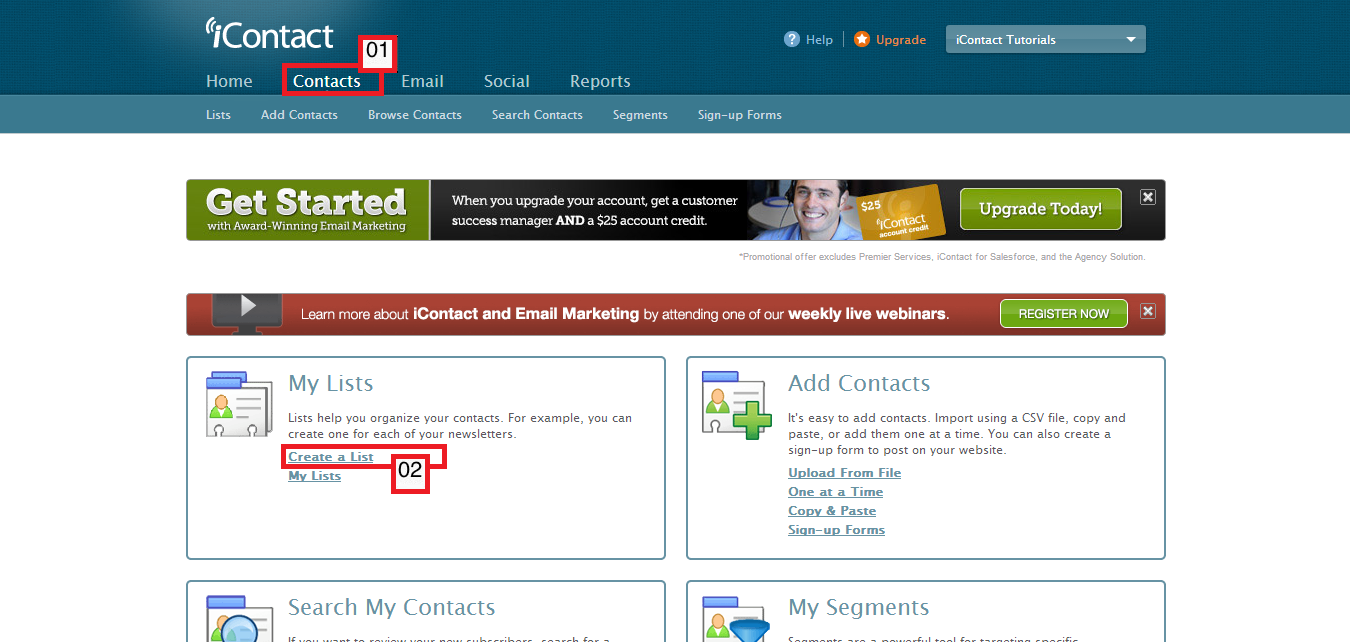
01. Click on the "Contacts" tab. This should display the "Contacts" tab's options on the dark blue bar below it.
02. Click on the "Create a List" option that shows from the "My Lists" part. This should take you to your "List Settings" page.
The two above-mentioned set of instructions should take you to your "List Settings" page, where you can type in your preferred information for your list.
Once you are on your "List Settings" page:
01. The very first information you need to provide your iContact Email Marketing Software is your preferred name for the new list that you are creating. This field is required.
02. The next field is your "List Description". Although this field is not required, some extremely organized people finds it useful filling this field out. You may just want to type in some descriptions that will describe what type of contacts your lists will contain.
If you name your list "Gaming", then you may want to put in some texts on the description. Something like, "These contacts are hardcore video game players."
03. "Public List Label" is also optional. This will be a name for your list that will be seen by your contacts on their "Manage Your Subscription" pages.
04. Last but not list, you may click on the "Save" or "Cancel" buttons which should take you back to your iContact Email Marketing Software's "My Lists" page.

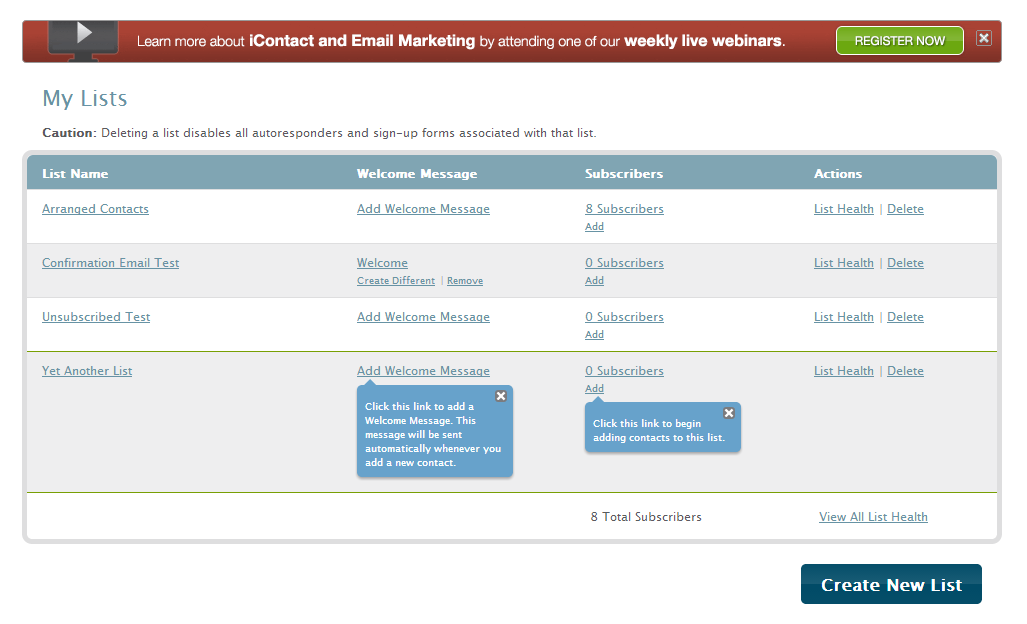
From this "My Lists" page you should be able to perform a number of tasks like:
1. Creating another list by clicking on the "Create New List" button.
2. Delete unwanted/unneeded list(s). This is true only if you have more than 1 list as the system will not let you delete if you only have 1 list in your "My Lists" page.
3. Add a "Welcome Message" to one or more of your "Lists". "Welcome Messages" are those sent to your contacts the moment they are added to your list(s) that has this option activated.
4. View the health of your list(s). List health would be composed of information such as your "Subscribed", "Unscubscribed", "Do Not Contact", "Pending", "Bounced", "Growth", "Total". This will be discussed in another article.
5. Go to the "Add Contacts to My Lists" page by clicking on the "Add" link that is found on the right part of each respective list name(s) you have.
6. Go back to the "List Settings" page of every list you have by clicking on the list name.
Now that you are done with creating your custom lists, it is time for you to add contacts to your iContact Email Marketing software. The "Adding Contacts To Your Lists" tutorial should guide you through.