Email messages / newsletters without pictures or images can be dull and boring. A good looking newsletter is the best way to spark the curiosity of your prospects or would be prospects. Since not all email clients / editors has the ability to embed images in their email messages, most email marketing software normally display images using the <img src="url of your image file"> HTML code.
Ways To Access Your iContact Image Library
1. From The Image Tab.
2. From The Message Builder Or Message Coder.
Accessing The Image Library From The Image Tab:
There are two ways to access the "Image Library" page from your "Email" tab. Please take a look on the instructions and images below.
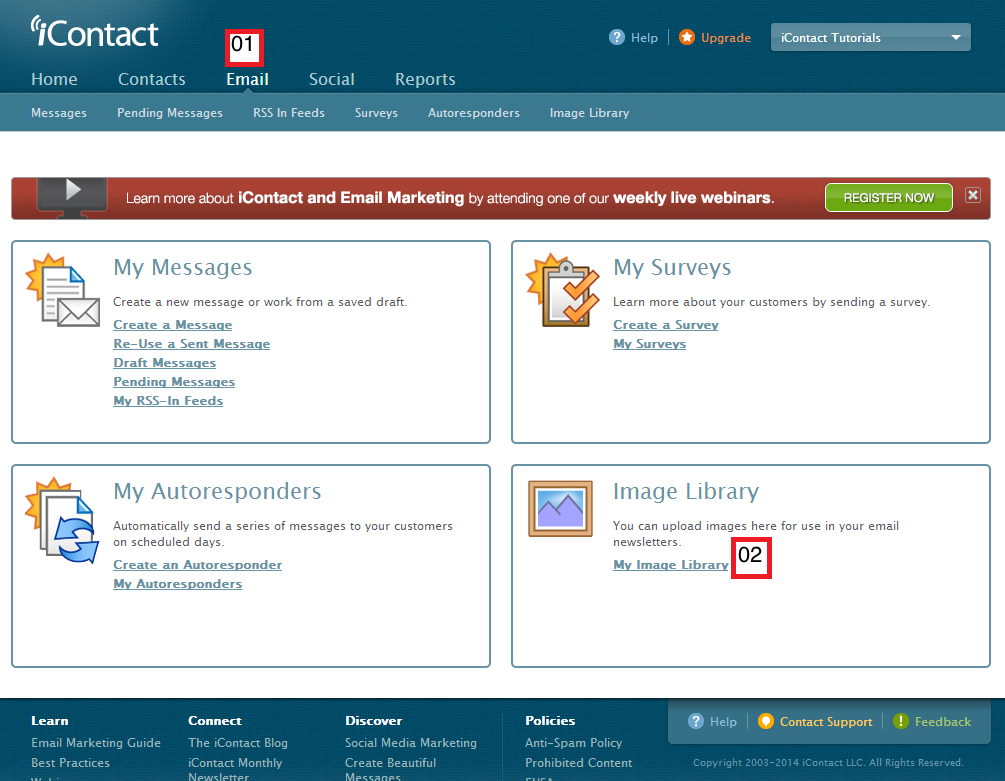
Process 1:
01. Click on the "Email" tab on the upper part of your iContact.
02. Click on the link that says "My Image Library" on the lower left part. This should take you to your "Image Library" page.
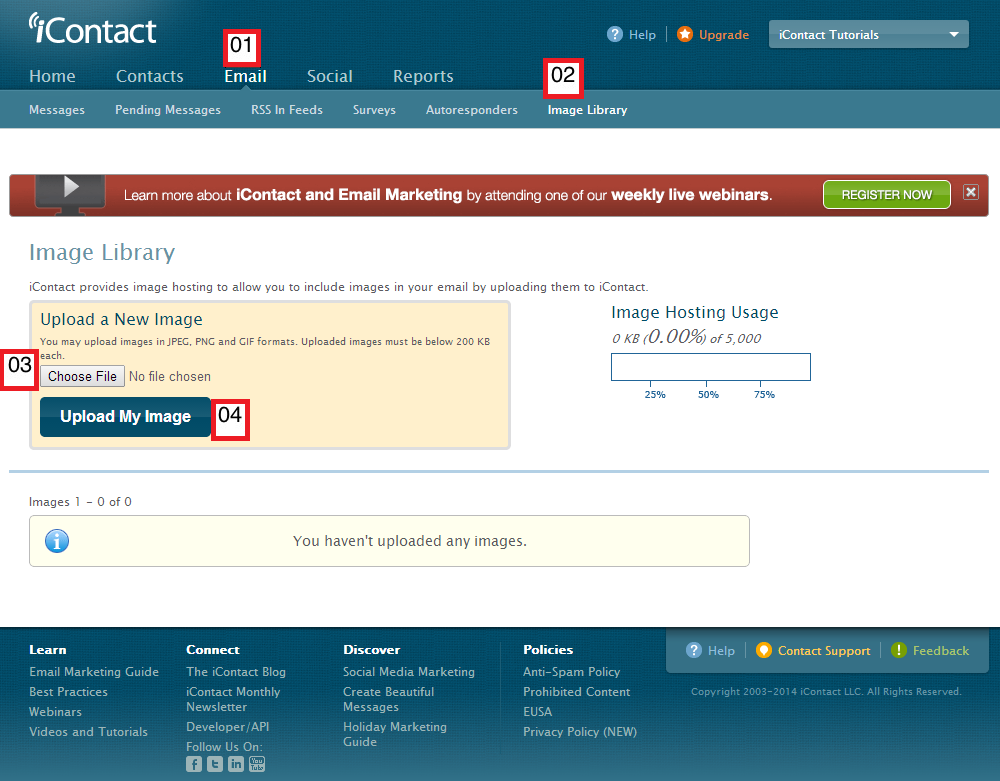
Process 2:
01. Click on the "Email" tab on the upper part of your iContact.
02. Click on the "Image Library" on the right part of that menu bar that says "Messages", "Pending Messages", "RSS In Feeds", "Surveys", "Autoresponders", "Image Library".
03. You may upload an image file from your computer by clicking on the "Choose File" button, then a popup that will provide you the option to choose which file from your computer you want to upload to your "Image Library" should appear.
04. Click on the "Upload My Image" button after choosing the image file you want to upload.
Accessing The Image Library From The Message Builder Or Message Coder:
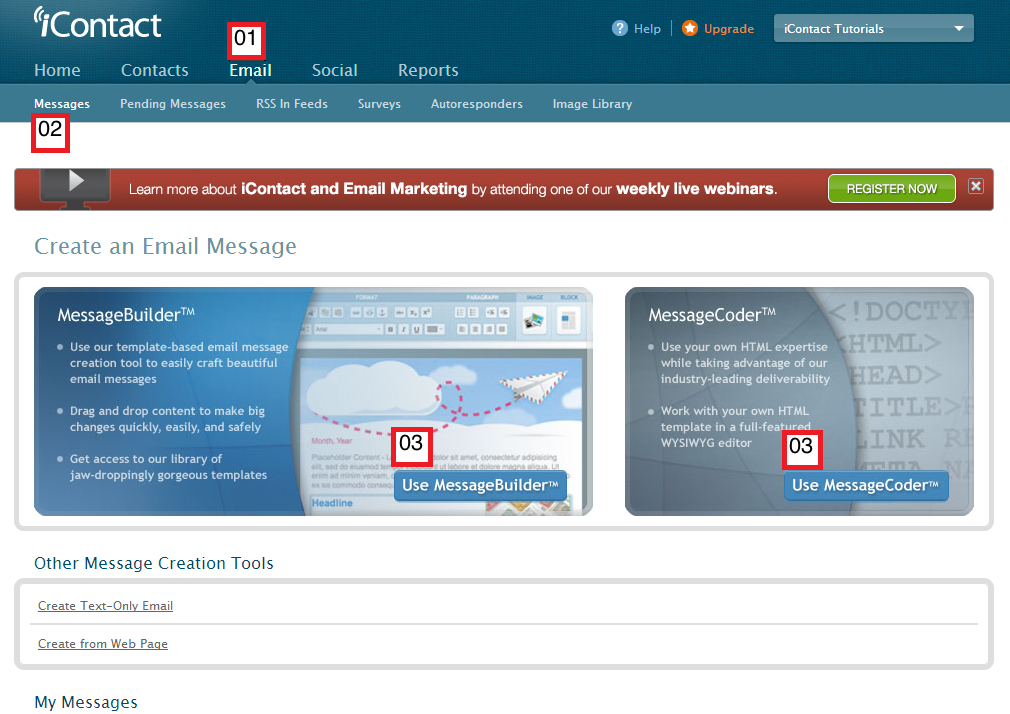
First you need to access your "Create an Email Message" page, please follow these steps:
01. Click on the "Email" tab.
02. Click on the "Messages" option.
03. Either you choose the "Message Builder" or the "Message Coder".
Access the "Image Library" from your "Message Builder":
From the screen shot above, if you choose to click on the "Message Builder" option, you will be taken to a screen that allow you to choose among some pre-built email / newsletter templates.
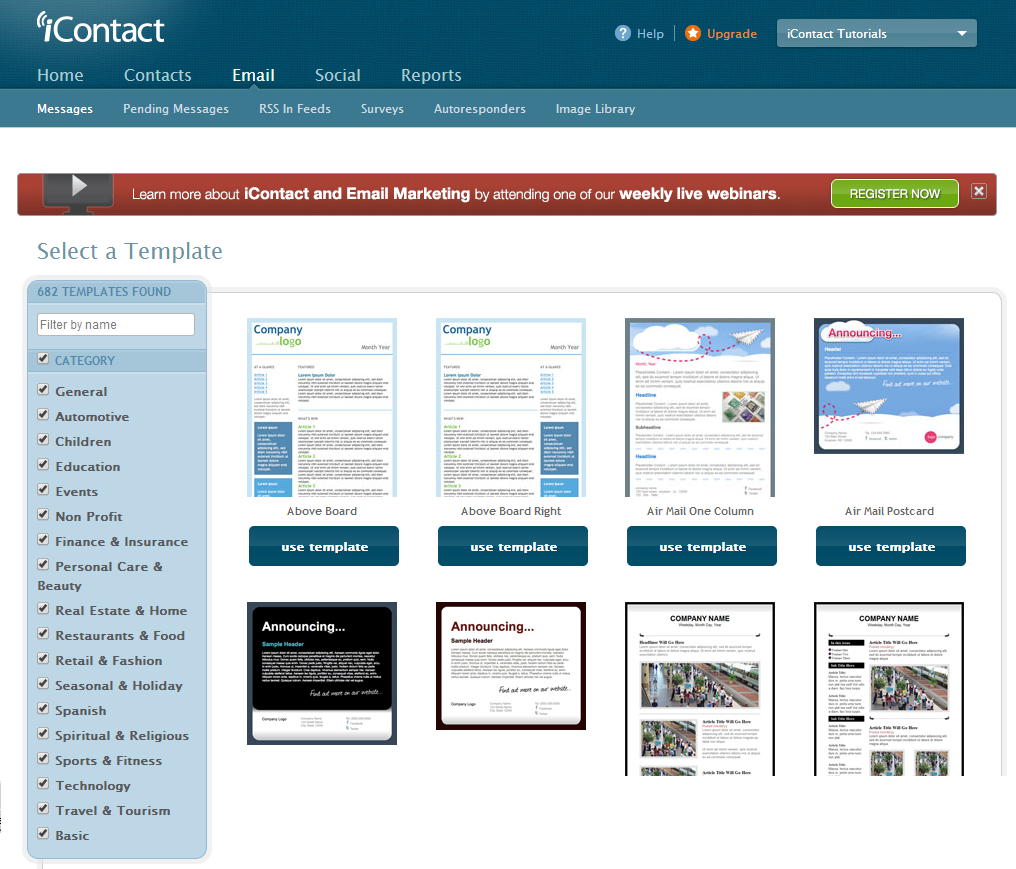
After choosing the email / newsletter template that suits your preference, the browser should show your "Create an Email Message" page similar to the page below.
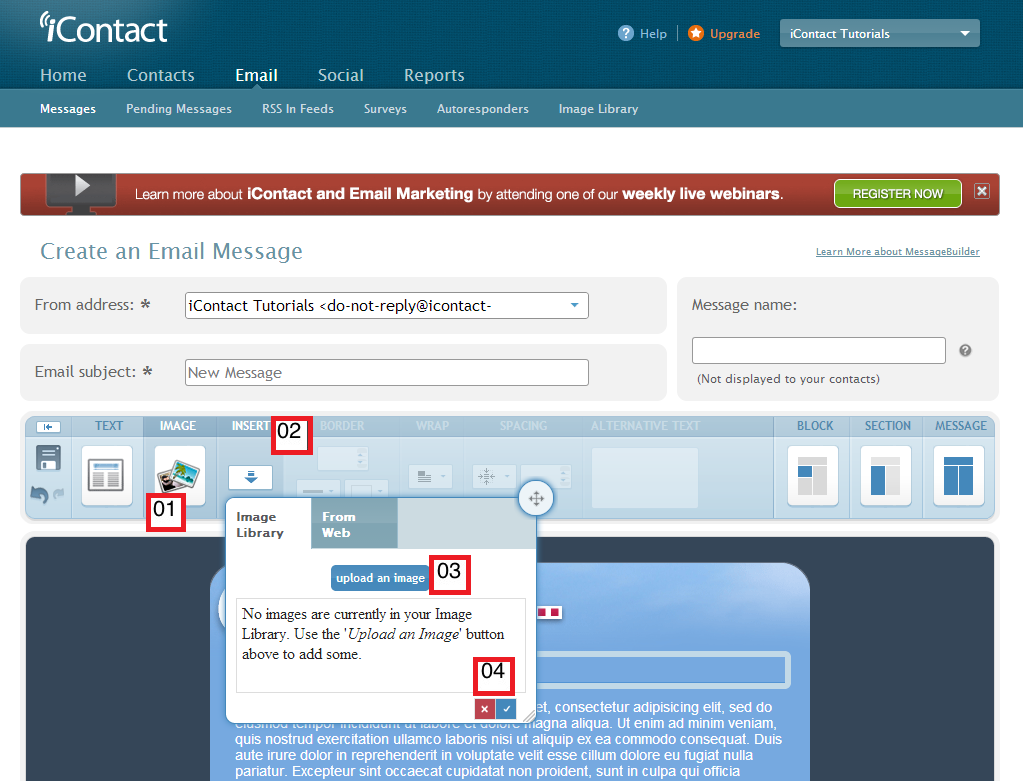
00. Click on the part where you want your image to appear on the email / newsletter that you are working on.
01. Click on the "IMAGE" option on the upper part (where it says "TEXT", "IMAGE", "BLOCK", "SECTION", "MESSAGE").
02. Click on the "INSERT" option beside where it says "IMAGE". A popup box should appear, and will give you the option to choose between "Image Library" and "From Web".
03. Clicking on the "upload an image" button should show another popup that will allow you to choose the image you want to upload from your computer.
04. These are buttons that you click if you want to cancel or confirm your "Insert Image" task.
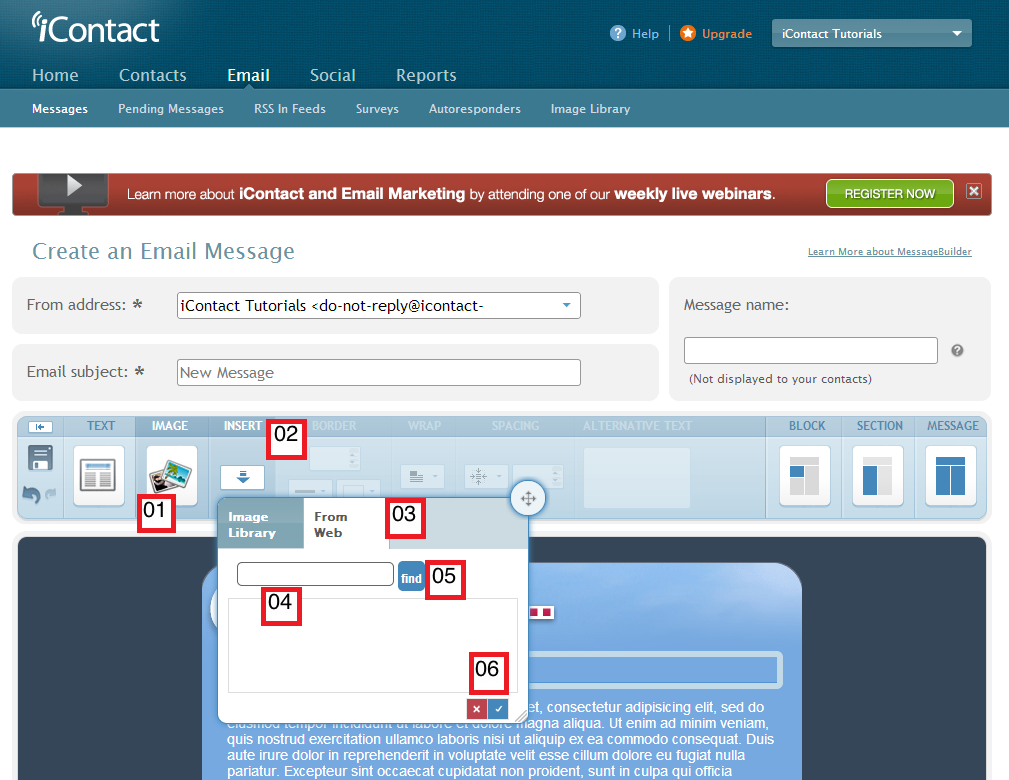
On the other hand, since the iContact "Image Library" only accept image files that are 200 kb (or below) in file size, some email marketer host their images in third party hosting such as Photobucket and Picasa Web. Then they use the "From Web" option of their iContact "Image Library".
00. Click on the part where you want your image to appear on the email / newsletter that you are working on.
01. Click on the "IMAGE" option on the upper part (where it says "TEXT", "IMAGE", "BLOCK", "SECTION", "MESSAGE").
02. Click on the "INSERT" option beside where it says "IMAGE". A popup box should appear, and will give you the option to choose between "Image Library" and "From Web".
03. Choose the "From Web" option.
04. Type in the URL of the image file that is hosted on your Photobucket or Picasa Web or whatever you hosting you use.
05. Click the "find" button and iContact where locate the image on the URL that you've typed in.
06. These are buttons that you click if you want to cancel or confirm your "Insert Image" task.
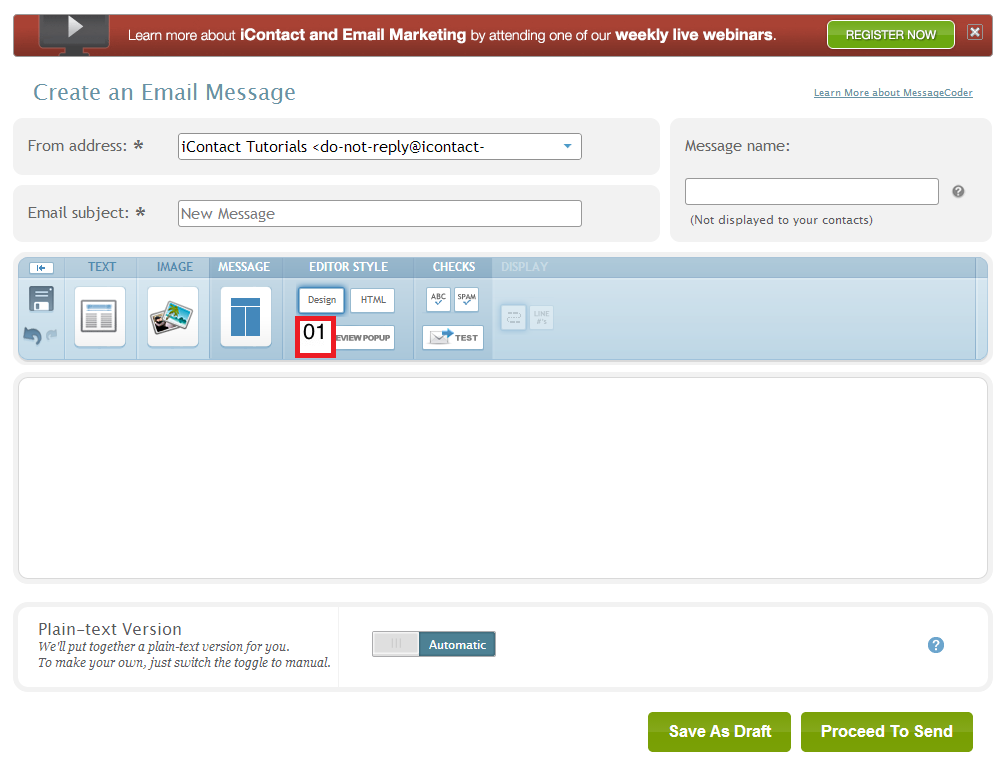
Access the "Image Library" from your "Message Coder":
With the "Message Coder", you should be in the
01. "Design" (view) under the "Editor Style" option to utilize the "INSERT" (image) option / popup shown above.
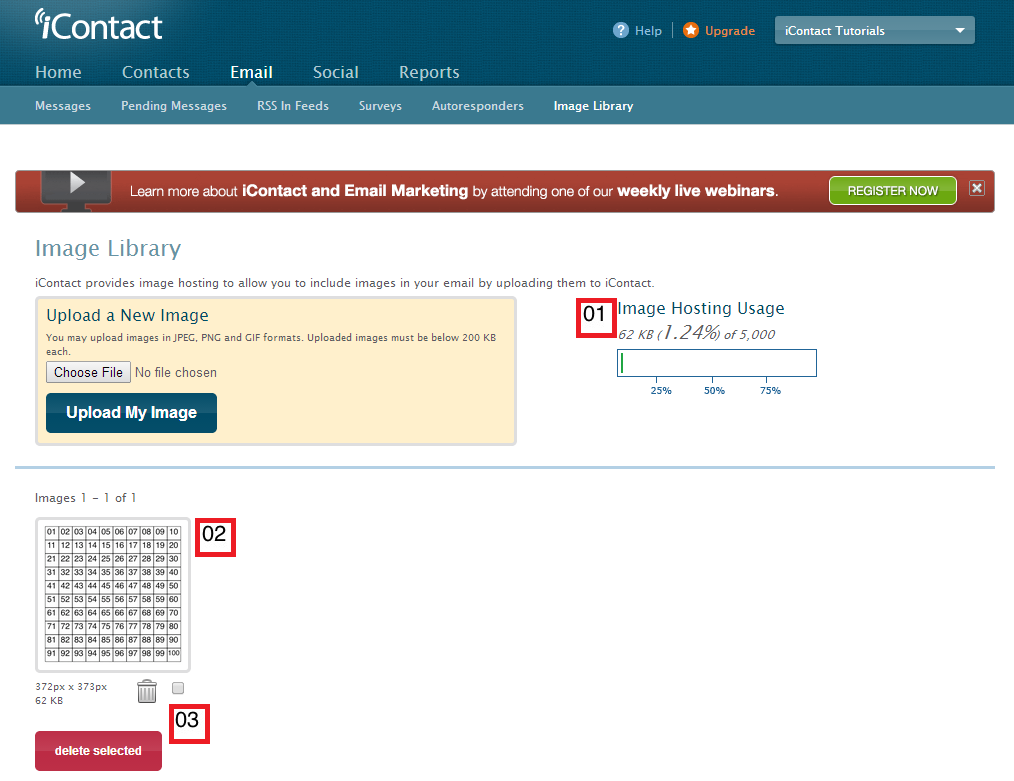
This is how your "Image Library" would look like if it has content(s) in it:
01. Shows your "Image Library's" storage capacity.
02. Thumbnail of your image file.
03. The trash bin icon is used for deleting image(s) you no longer need. The check box icon (beside the trash bin icon) is used for selecting / de-selecting image(s) for possible mass deletion in case you want to use the "delete selected" button.